This in-depth guide explores setting up and optimizing Google Analytics, covering account creation, tracking code integration, advanced features, and data analysis. It includes FAQs, actionable insights, and integration tips to help businesses make data-driven decisions and enhance marketing performance.
Analyzing how well your website performs is essential if you want to make data-driven choices that bring more traffic, lead to greater engagement, and net more sales. In the digital landscape, operating without data is like driving blindfolded. You might eventually get somewhere, but it likely won’t be your intended destination, and the journey will be fraught with unnecessary risks. Google Analytics is a robust (and free!) tool that provides valuable insight into how visitors engage with your website, which enables you to make data-driven decisions to grow your business effectively.
This post is the ultimate guide to all you need to know to set up Google Analytics. Whether you’re a site owner, a small business entrepreneur, or a marketing professional, this guide is a comprehensive walk-through of everything you need to know. We will cover everything from account setup to a number of the most useful reports and analysis techniques. By the end of this article, you will not only have Google Analytics installed but will also understand how to leverage it for maximum impact.
Why Google Analytics Matters for Your Business
Before we jump into setting it up, it is crucial to understand why Google Analytics is essential for any website. It isn’t just a counter of hits; it is a sophisticated business intelligence platform.
Measure Success Accurately
Discover what’s working (and what’s not) through key performance indicators (KPIs). You can track metrics like website traffic, conversion rates, and bounce rates. Without Google Analytics, you are guessing. With it, you are measuring. You can see which blog posts are resonating, which product pages are converting, and which landing pages are causing users to leave immediately.
Understand Your Audience Deeply
Who are your visitors? Where are they coming from? What are they searching for? Google Analytics provides demographic data, geographic locations, and even interests. This allows you to build a persona of your average user. Are they mobile users from New York interested in technology? Or are they desktop users from London looking for fashion tips? Knowing this allows you to tailor your messaging perfectly.
Optimize Your Site for Performance
Use data-driven insights to refine your content, SEO strategy, and advertising campaigns. If you see that users are spending a long time on a specific page, you know that the content is valuable. Conversely, if a checkout page has a high exit rate, you know there is a friction point that needs fixing. Google Analytics acts as a diagnostic tool for your website’s health.
Track ROI Effectively
Whether it’s from ad spend or organic traffic, you’ll understand how every dollar performs. Marketing without tracking return on investment (ROI) is a recipe for wasted budget. Google Analytics allows you to attribute sales and leads to specific channels, helping you decide where to allocate your marketing budget for the next quarter.
Now, onto the practical steps!
Step 1: Setting Up Your Google Analytics Account
The foundation of tracking begins with creating an account. This process is straightforward but requires attention to detail to ensure your data is collected correctly from day one.
Visit the Official Google Analytics Website
Head to Google Analytics and sign in using your Google account. If you already use Gmail or Google Drive, you can use those same credentials. If not, create a new Google account specifically for your business to keep things organized.
Set Up an Account
Click on “Start Measuring.” You will be asked to enter an account name. This should typically be your business name. You will then see data-sharing settings. Google asks for permission to share your data for benchmarking and technical support. Review these options and check the boxes that you are comfortable with.
Property Setup
Next, you need to set up a property. In the context of Google Analytics, a property represents a website or app. Give your property a name (e.g., “My Website Analytics”) and select your time zone and currency. This is critical for reporting; if your business operates in New York but your analytics are set to London time, your daily reports will be skewed.
Choose Your Data Stream
Decide the platform you want to track. For websites, select “Web.” You will then be asked to enter your site’s URL (e.g., www.example.com) and give the stream a name. This creates a unique measurement ID for your specific website.
Accept the Terms
Agree to Google’s terms of service. Be sure to read through them, specifically regarding data privacy and GDPR compliance if you have visitors from Europe. Once accepted, your account is set up!
Now you need to connect your website via the tracking code.
Step 2: Adding the Google Analytics Tracking Code to Your Website
![]()
The Google Analytics tracking code is a snippet of JavaScript that collects data from your website and sends it to your analytics account. Without this code, the platform cannot function. Here’s how you can add it:
Method 1: Add the Code Manually to Your HTML
This method is suitable for those who are comfortable editing code. It involves placing the script directly into your website’s header.
- Find the Code: Find the tracking code provided by Google Analytics after setup. It is usually labeled as the Global Site Tag (gtag.js).
- Copy the Snippet: Copy the entire block of code.
- Edit HTML: Open your website’s HTML files. You need to paste the snippet into the
<head>section of every page you want to track. Ideally, place it right after the opening<head>tag or just before the closing</head>tag. - Save and Verify: Save your changes and refresh your website. You can view the page source to ensure the code is present.
Method 2: Use Google Tag Manager
This is the recommended method for most businesses as it provides flexibility for adding other tags later without touching the code again.
- Create Account: Set up a Google Tag Manager account and container.
- Add New Tag: Add a new tag and select “Google Analytics: GA4 Configuration” as the tag type.
- Enter ID: Paste your Measurement ID (starts with “G-“).
- Set Trigger: Choose “All Pages” as the trigger to ensure it fires on every page load.
- Publish: Publish the container to make the changes live.
This method is perfect if you plan to manage multiple tracking or marketing tags in the future, such as Facebook Pixels or LinkedIn Insights tags.
Method 3: CMS/Plugin Integration
Using WordPress or another CMS? Many platforms offer Google Analytics plugins that make integration seamless without any coding knowledge.
- Install Plugin: Install a plugin like MonsterInsights or Site Kit by Google.
- Connect: Connect your plugin to Google Analytics by authenticating with your Google account.
- Select Property: Choose the property you just created.
- Activate: Save settings. The plugin will automatically insert the tracking code on all pages.
Choose the method that matches your technical expertise and website setup. Regardless of the method, the goal is the same: to get the Google Analytics script running on your site.
Step 3: Navigating the Google Analytics Dashboard
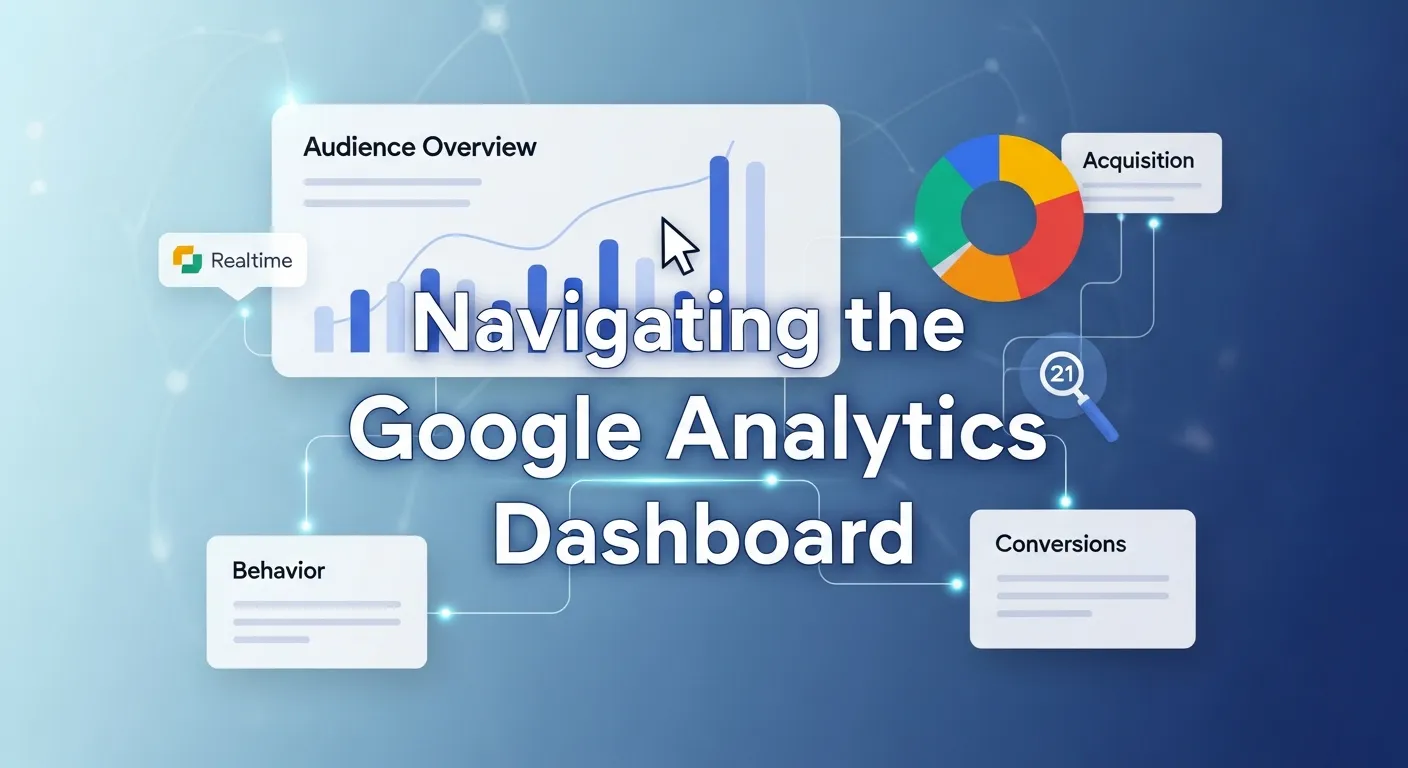
Welcome to your new data playground! The Google Analytics dashboard might seem a bit overwhelming at first glance, but it is structured logically. Here’s a breakdown of the most important areas you will use daily.
Home
This is your command center. It provides a snapshot of important metrics like user activity, new visitors, and active sessions. You can see a real-time view of how many people are on your site right now, which is incredibly satisfying after launching a new campaign.
Acquisition
Find out where your traffic is coming from! This tab shows the performance of channels like organic search, social media, paid ads, and referrals.
- Organic Search: Visitors find you via Google or Bing.
- Direct: Visitors typing your URL directly into their browser.
- Referral: Visitors clicking a link from another website.
- Social: Traffic from platforms like Facebook, Twitter, or LinkedIn.
Behavior (Engagement)
Track how users interact with your content. This section (often called “Engagement” in GA4) reveals page views, time on page, and bounce rates. You can see which pages keep users hooked and which ones cause them to leave.
- Pages and Screens: Which specific URLs are being viewed?
- Landing Page: What is the first page a visitor sees?
- Events: Specific interactions like clicks or video plays.
Conversions (Monetization)
Monitor your conversion goals, whether it’s form submissions, purchases, or sign-ups. In Google Analytics 4, everything is an event, and important events can be marked as conversions. If you run an e-commerce store, the Monetization tab will be your best friend, showing revenue, average order value, and product performance.
Take some time to explore each section and customize reports based on your business goals.
Integrating Google Analytics with Mobile Marketing Tools
In the modern digital ecosystem, your website analytics do not exist in a vacuum. They are often part of a broader strategy that involves mobile marketing and content creation tools. Integrating your data insights with tools like Canva for creative assets or mobile marketing apps creates a cohesive feedback loop. For instance, if Google Analytics shows that mobile users prefer visual content, you can use mobile design apps to create better assets.
The Synergy of Design and Data
When you understand which graphics perform best on your mobile site via Google Analytics, you can streamline your creation process. Tools that allow for quick mobile editing become essential.
Key Benefits of Integration:
- Faster Iteration: Quickly update mobile creatives based on real-time bounce rates.
- Visual Consistency: Ensure your mobile ads match the landing page experience.
- Data-Backed Design: Stop guessing what colors or layouts work; let the data decide.
Comparison of Mobile Marketing Assets
|
Asset Type |
Analytics Metric to Watch |
Optimization Action |
|---|---|---|
|
Hero Images |
Bounce Rate |
Test different imagery if bounce rate is high on mobile. |
|
Infographics |
Time on Page |
Create longer, more detailed graphics to increase dwell time. |
|
Call-to-Action Buttons |
Click-Through Rate (CTR) |
Adjust color and size based on click events. |
By utilizing specific mobile marketing applications, you can enhance your workflow significantly.
For a deeper dive into tools that bridge this gap, check out this resource:
Mobile Marketing Apps: Canva & Google Analytics
This integration ensures that your creative efforts in apps like Canva are directly informed by the hard data you collect in Google Analytics, leading to a more efficient marketing strategy.
Step 4: Analyzing Website Data for Insights and Improvements
Once data starts streaming in, the real work begins. Collecting data is passive; analyzing it is active. Here’s how you can use Google Analytics to drive improvements.
1. Find Out What’s Working
Identify your top-performing pages under Behavior > Site Content > All Pages (or Engagement > Pages and Screens in GA4). Look for pages with high views and long average engagement times. Use this data to focus on replicating successful strategies. If “How-to” guides are performing well, write more of them. If video content keeps users on the page longer, invest in video production.
2. Pinpoint Traffic Sources
Under Acquisition > Overview, check where most of your traffic is coming from. Are you getting a lot of traffic from Pinterest but none from LinkedIn? Improve underperforming channels (like paid ads or email marketing) based on this data. Perhaps your paid ads have a high click-through rate but a high bounce rate—this indicates a disconnect between the ad copy and the landing page.
3. Understand Audience Behavior
Dive into user demographics and interests under Audience. Use this insight to fine-tune your content for your target audience. If Google Analytics tells you your audience is primarily 18-24 year olds interested in gaming, your corporate, formal tone might be alienating them. Adjust your voice to match the data.
4. Analyze Site Speed
Google Analytics also provides reports on site speed. A slow website kills conversions. Use the Site Speed reports to identify which pages are loading slowly and prioritize fixing them. This is crucial for both user experience and SEO rankings.
Mastering Advanced Marketing Strategies with Analytics
To truly excel, you must move beyond basic page views and start mastering the art of marketing analytics. Google Analytics is the engine that powers sophisticated marketing strategies, allowing you to segment users and target them with precision.
The Role of Segmentation
Segmentation allows you to isolate specific subsets of your traffic. You can analyze “New Users” separately from “Returning Users.” This is vital because a returning user likely has a higher intent to purchase than a new user. You can also segment by device, looking specifically at how tablet users interact with your checkout flow compared to desktop users.
Strategic Points for Marketing Success:
- Behavioral Targeting: Create audiences based on specific actions, like adding an item to a cart but not purchasing.
- Geographic Focus: Identify which cities yield the highest revenue and target ads there.
- Content Mapping: Map your most visited blog posts to your sales funnel to see how content influences buying decisions.
Marketing Impact Metrics
|
Metric |
Definition |
Marketing Implication |
|---|---|---|
|
Session Duration |
Average length of a visit. |
Indicates content quality and user interest. |
|
Pages per Session |
Average number of pages viewed. |
Shows how well your site encourages exploration. |
|
Goal Completion Rate |
Percentage of visitors completing a goal. |
The ultimate measure of marketing effectiveness. |
By mastering these elements, you transform raw data into a roadmap for success.
For more on becoming a pro at this, read this guide:
Mastering Google Analytics for Marketing Success
Understanding these deeper layers of Google Analytics puts you ahead of competitors who only look at vanity metrics like total hits.
Step 5: Advanced Features of Google Analytics

Take your analysis to the next level by utilizing the advanced features that Google Analytics offers. These tools allow for customization that fits your unique business needs.
Set Up Goals (Conversions)
Under “Admin > View > Goals” (or Configure > Events > Mark as Conversion in GA4), define goals like completing a purchase, signing up for an email list, or spending a specific amount of time on-site. Goals give your data purpose. Without them, you don’t know if your traffic is valuable.
Enable Event Tracking
Track actions like button clicks, video plays, and file downloads by integrating Google Tag Manager with Google Analytics. Standard tracking only shows page loads. Event tracking tells you what people do on the page. Did they scroll 90% of the way down? Did they click the “Contact Us” mailto link?
Custom Reports
Tailor reports to display metrics most relevant to your organization. If you are a publisher, you might want a report focusing on ad revenue and time on page. If you are a SaaS company, you might focus on sign-ups and churn. Google Analytics allows you to build these custom dashboards so you don’t have to filter data manually every time.
Integration with Other Tools
Sync Google Analytics with Google Ads, Search Console, or CRM platforms for deeper insights. Linking Search Console allows you to see which organic search queries brought users to your site. Linking Google Ads allows you to see the full customer journey from ad click to conversion.
Audiences for Remarketing
Create audiences in Google Analytics (e.g., “Users who visited the pricing page”) and share them with Google Ads. This allows you to show targeted ads specifically to people who have already shown interest in your product, significantly increasing the likelihood of conversion.
Optimizing Performance Max Campaigns
One of the most powerful ways to use Google Analytics data is by feeding it into automated advertising systems like Google’s Performance Max. These campaigns use machine learning to serve ads across all of Google’s inventory, but they need high-quality data to function correctly.
Feeding the Algorithm
Performance Max relies on conversion data. If your Google Analytics setup is tracking conversions accurately, Performance Max can find more users who are likely to convert. It creates a symbiotic relationship: your analytics inform the ads, and the ads drive data back into analytics.
Best Practices for Campaign Optimization:
- Data Integrity: Ensure your conversion tracking is flawless before launching Performance Max.
- Audience Signals: Use your Google Analytics audience segments as signals to guide the machine learning models.
- Asset Groups: Monitor which creative assets perform best and double down on them.
Campaign Performance Indicators
|
Indicator |
Description |
Optimization Strategy |
|---|---|---|
|
ROAS (Return on Ad Spend) |
Revenue divided by ad cost. |
Increase budget on high ROAS campaigns. |
|
CPA (Cost Per Acquisition) |
Cost to acquire one customer. |
Refine targeting to lower CPA. |
|
Conversion Value |
Total value of conversions. |
Focus on high-value products or services. |
Optimizing these campaigns requires a deep understanding of how analytics and ad tech intersect.
For a detailed walkthrough on this specific ad type, refer to:
How to Master Google Performance Max Campaigns
By aligning your Google Analytics data with Performance Max, you can automate much of your user acquisition while maintaining high efficiency.
Step 6: Troubleshooting Common Issues
Even with a perfect setup, issues can arise. If something doesn’t seem right, these tips may help you troubleshoot common Google Analytics problems.
Data Not Showing?
Double-check your tracking code placement or settings in Google Tag Manager. Use the “Real-Time” report to test. Open your website in a private browser window and see if you appear in the Real-Time report. If not, the code is likely not firing.
Duplicate Tracking?
Ensure that the tracking code is applied only once. If you hardcoded it into the HTML and used a plugin, you might be counting every page view twice. This inflates your metrics and ruins your bounce rate data (often showing a near-zero bounce rate).
Disconnects or Errors
Regularly review the “Diagnostics” section for alerts and solutions. Google will often notify you if it detects anomalies, such as a sudden drop in traffic or missing parameters.
Self-Referral Issues
If you see your own website domain listed as a referral source, you have a self-referral issue. This usually happens if the tracking code is missing from some pages or if you have cross-domain tracking set up incorrectly.
Bot Traffic
Sometimes, you might see a spike in traffic that isn’t real users. Google Analytics has built-in bot filtering, but some bots slip through. Keep an eye on traffic sources with 100% bounce rates and 0-second session durations; these are likely bots.
Empower Your Website with Data
The first step you can take on your journey to make data-driven decisions is to add Google Analytics to your website. Leverage its knowledge and cutting-edge capabilities to maximize your website and marketing performance and ultimately accomplish your business goals.
Looking for assistance with online analytics or taking steps to enhance your digital presence? Looking for more FREE SEO help? Why not try our Beginners’ SEO Guide, or if you’re looking for a custom-made solution, why not drop our team of SEO experts an email or call?
Frequently Asked Questions (FAQ)
1. Is Google Analytics really free to use?
Yes, the standard version of Google Analytics is completely free and sufficient for the vast majority of businesses, from small blogs to large e-commerce sites. There is a premium enterprise version called Analytics 360, but it is designed for massive corporations with immense data needs. For most users, the free version offers robust features without any cost.
2. Can I use Google Analytics to track individual users?
No, Google Analytics prohibits the collection of personally identifiable information (PII) such as names, email addresses, or phone numbers. The data is aggregated and anonymized. While you can track User IDs to stitch together sessions across devices, you cannot upload data that explicitly identifies an individual within the platform interface, as this violates Google’s terms of service and privacy laws.
3. How does business analytics drive growth strategy?
Business analytics moves you from intuition-based decisions to evidence-based strategy. By analyzing customer behavior, purchase patterns, and traffic sources, you can identify high-growth opportunities and cut wasteful spending.
Business Analytics Growth Strategy
This strategic approach ensures that every marketing dollar contributes to scalable growth.
4. What is the difference between Bounce Rate and Exit Rate?
This is a common point of confusion. Bounce Rate represents the percentage of sessions where a user viewed only one page and then left without interacting. Exit Rate, on the other hand, is the percentage of people who left your site from a specific page, regardless of how many pages they viewed beforehand. A high exit rate on a “Thank You” page is good; a high bounce rate on a homepage is usually bad.
5. Does Google Analytics affect my website speed?
The impact is generally negligible. The Google Analytics script loads asynchronously, meaning it doesn’t stop the rest of your page from loading while it processes. However, if you load too many different tracking scripts (Facebook, LinkedIn, Hotjar, etc.), the cumulative effect can slow down your site. Using Google Tag Manager helps manage this efficiently.
6. Why is analytical experience important for a team?
Having a team that understands how to interpret data is just as important as the tools themselves. Analytical experience allows your staff to look at a chart and understand the “why” behind the numbers.
The Power of Analytical Experience
Investing in analytical training empowers your team to make smarter, faster decisions.
7. How long does it take for data to show up?
For standard reports, it can take 24-48 hours for Google Analytics to process and display data fully. However, the “Real-Time” report shows activity as it happens. If you just installed the code, check the Real-Time report immediately to verify it’s working, but wait a day before analyzing trends in standard reports.
8. Can I delete data from Google Analytics?
Generally, you cannot delete specific data points once they have been processed. However, you can set data retention periods (e.g., 14 months) after which user-level data is automatically deleted. If you accidentally upload PII (Personally Identifiable Information), you may have to delete the entire property to comply with privacy regulations, so be very careful about what you collect.
9. What is the role of analytical chemistry in data?
While it sounds unrelated, the precision found in scientific disciplines applies to data science. Just as chemistry breaks down substances, analytics breaks down complex user behaviors into understandable components.
What is Analytical Chemistry
This meticulous approach to examining data elements ensures accuracy and reliability in your reporting.
10. What is the difference between Universal Analytics (UA) and GA4?
Universal Analytics (UA) was the previous generation of Google Analytics, which relied heavily on cookies and sessions. GA4 (Google Analytics 4) is the current standard, which uses an event-based model. GA4 is designed to be more privacy-centric, works better across multiple devices (app + web), and uses machine learning to fill in data gaps. UA has been sunsetted, so all new setups must be GA4.